
IMPACT DRIVER BASICS
An impact driver can make long screws and stubborn fasteners much easier to handle, but its speed and hammering action can surprise first-time users. The key is simple: use the right impact-rated bit, keep the tool straight, and control the power with the trigger instead of squeezing it fully from the start.
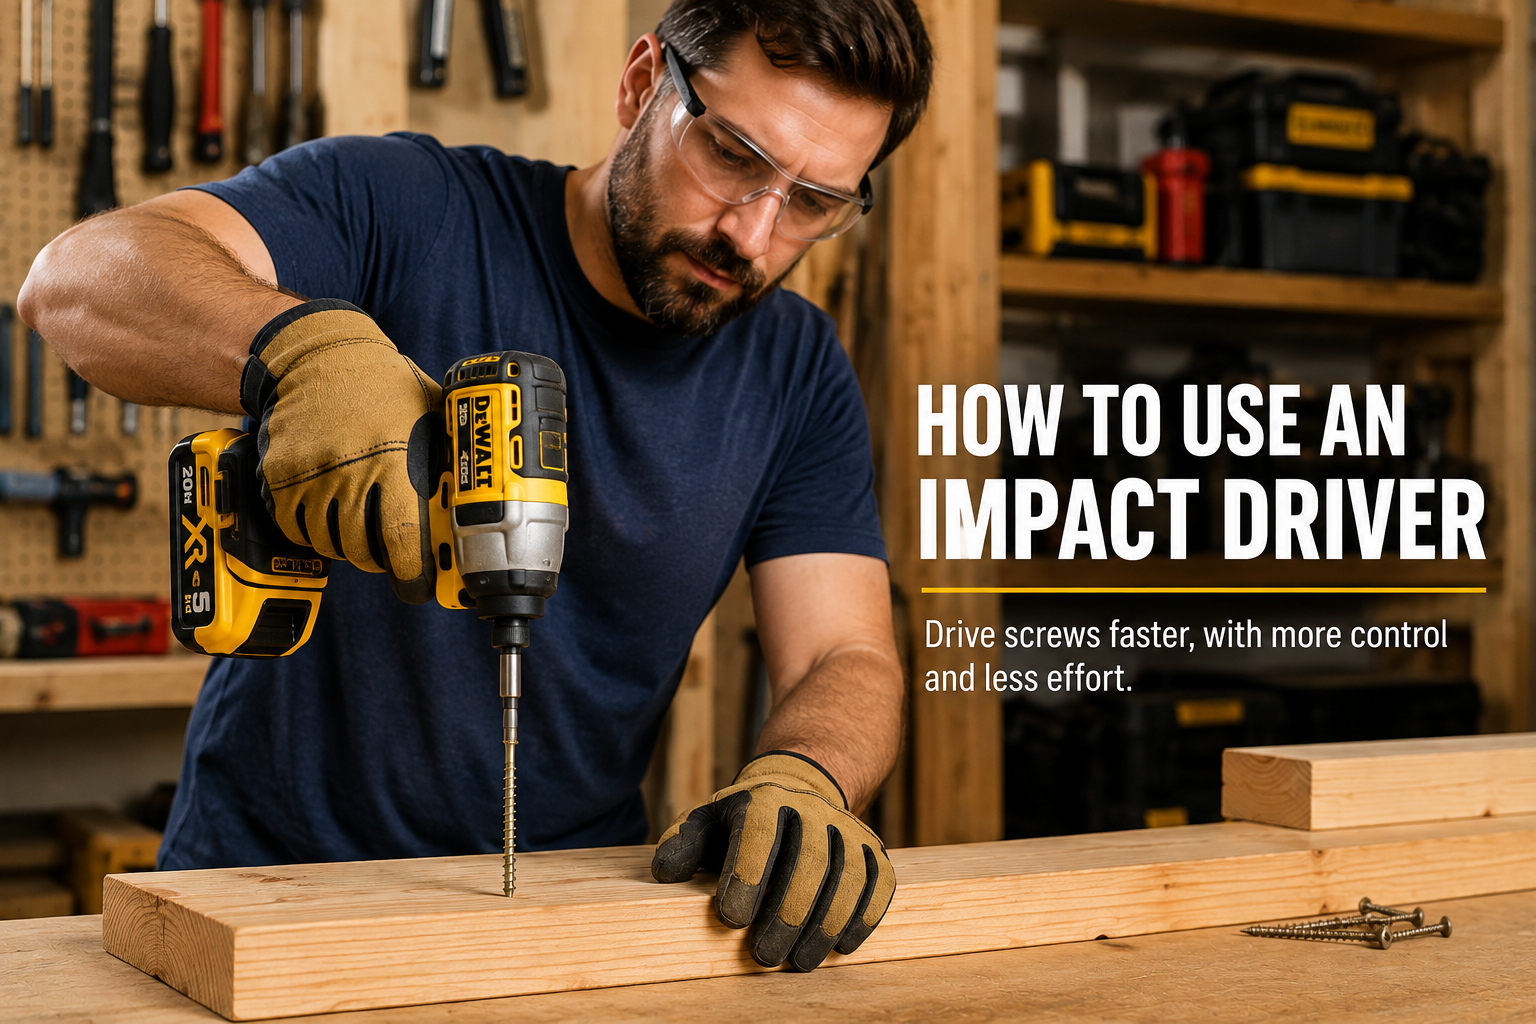
How to Use an Impact Driver: Start With the Basics
An impact driver is a compact power tool designed primarily for driving screws, bolts, and other fasteners. It looks similar to a cordless drill, but instead of a three-jaw chuck it normally uses a quick-change 1/4-inch hex collet.
When resistance increases, the tool adds rapid rotational impacts. That extra action helps drive demanding fasteners while reducing the twisting reaction you often feel through the handle of a conventional drill.
That makes an impact driver especially useful for deck screws, structural screws, long wood screws, lag-style fasteners, and repetitive fastening. If you are deciding whether you actually need one, our cordless drill vs impact driver comparison explains where each tool makes more sense.
Know Your Impact Driver
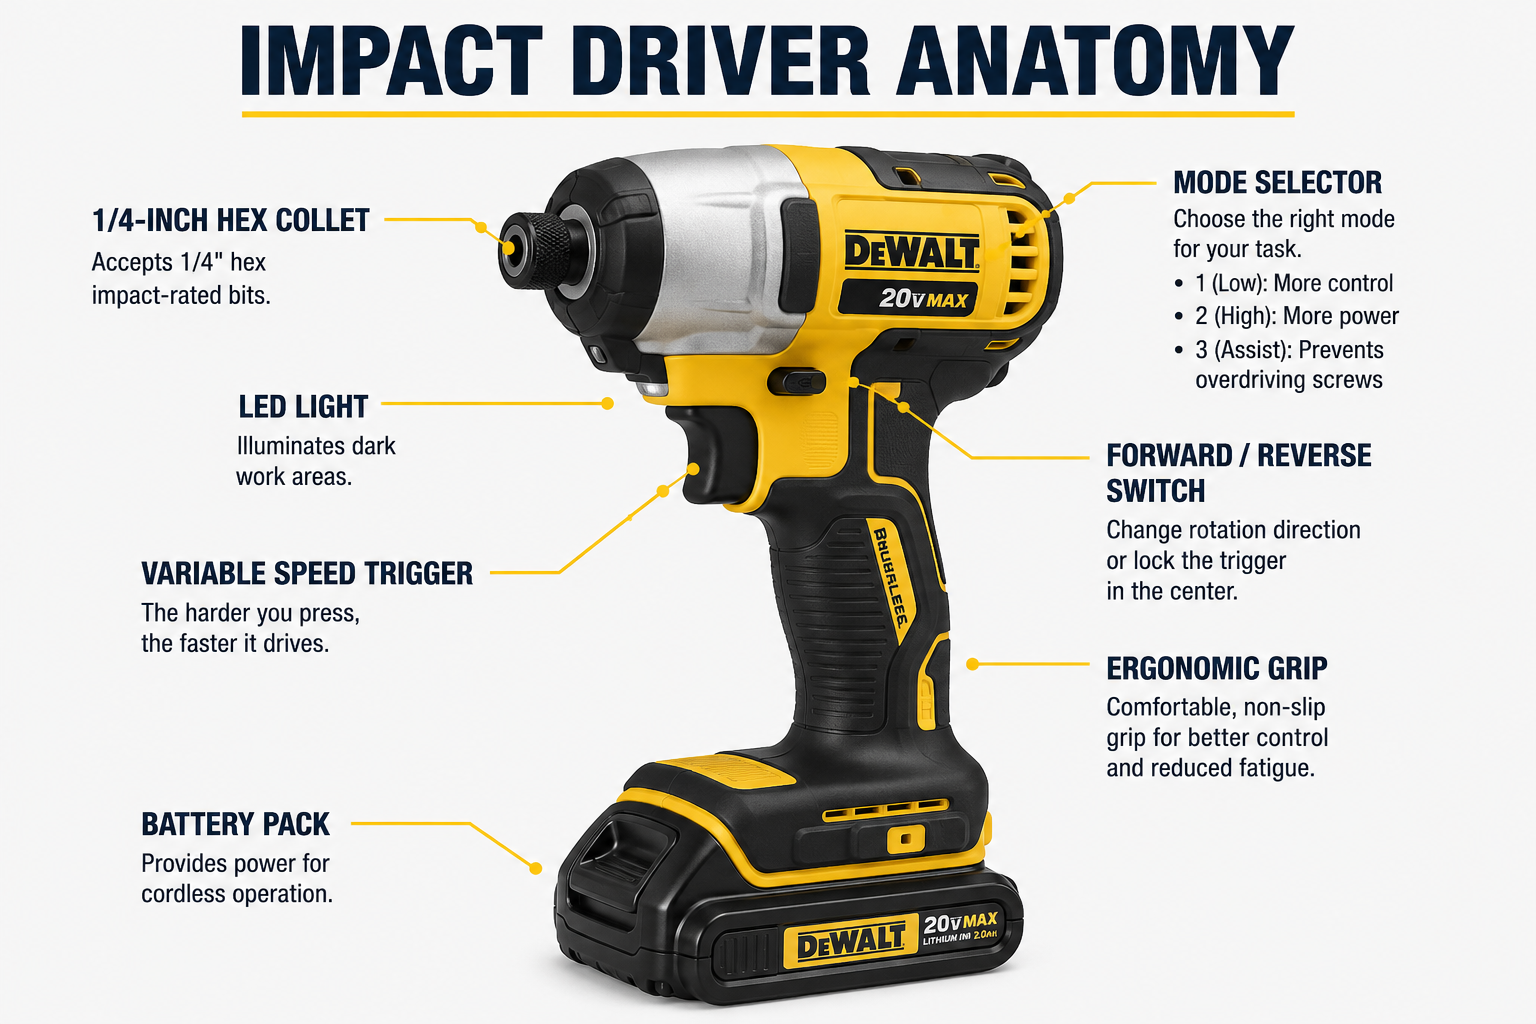
Impact drivers are fairly simple once you know the controls. Before installing a bit, identify these parts on your own model. OSHA’s hand and power tool safety guidance is also a useful general reference for safe portable-tool use.
Holds 1/4-inch hex-shank bits and accessories and allows quick bit changes without tightening a drill chuck.
Light pressure gives you a slow, controlled start; squeezing farther increases speed.
Use forward to drive fasteners and reverse to remove them. Many tools lock the trigger in the center position.
Lower modes improve control on smaller screws; higher modes provide more driving force.
Make sure the battery is charged and fully seated before starting the job.
Most modern drivers include an LED around or near the collet to illuminate the fastener.
How to Set Up an Impact Driver
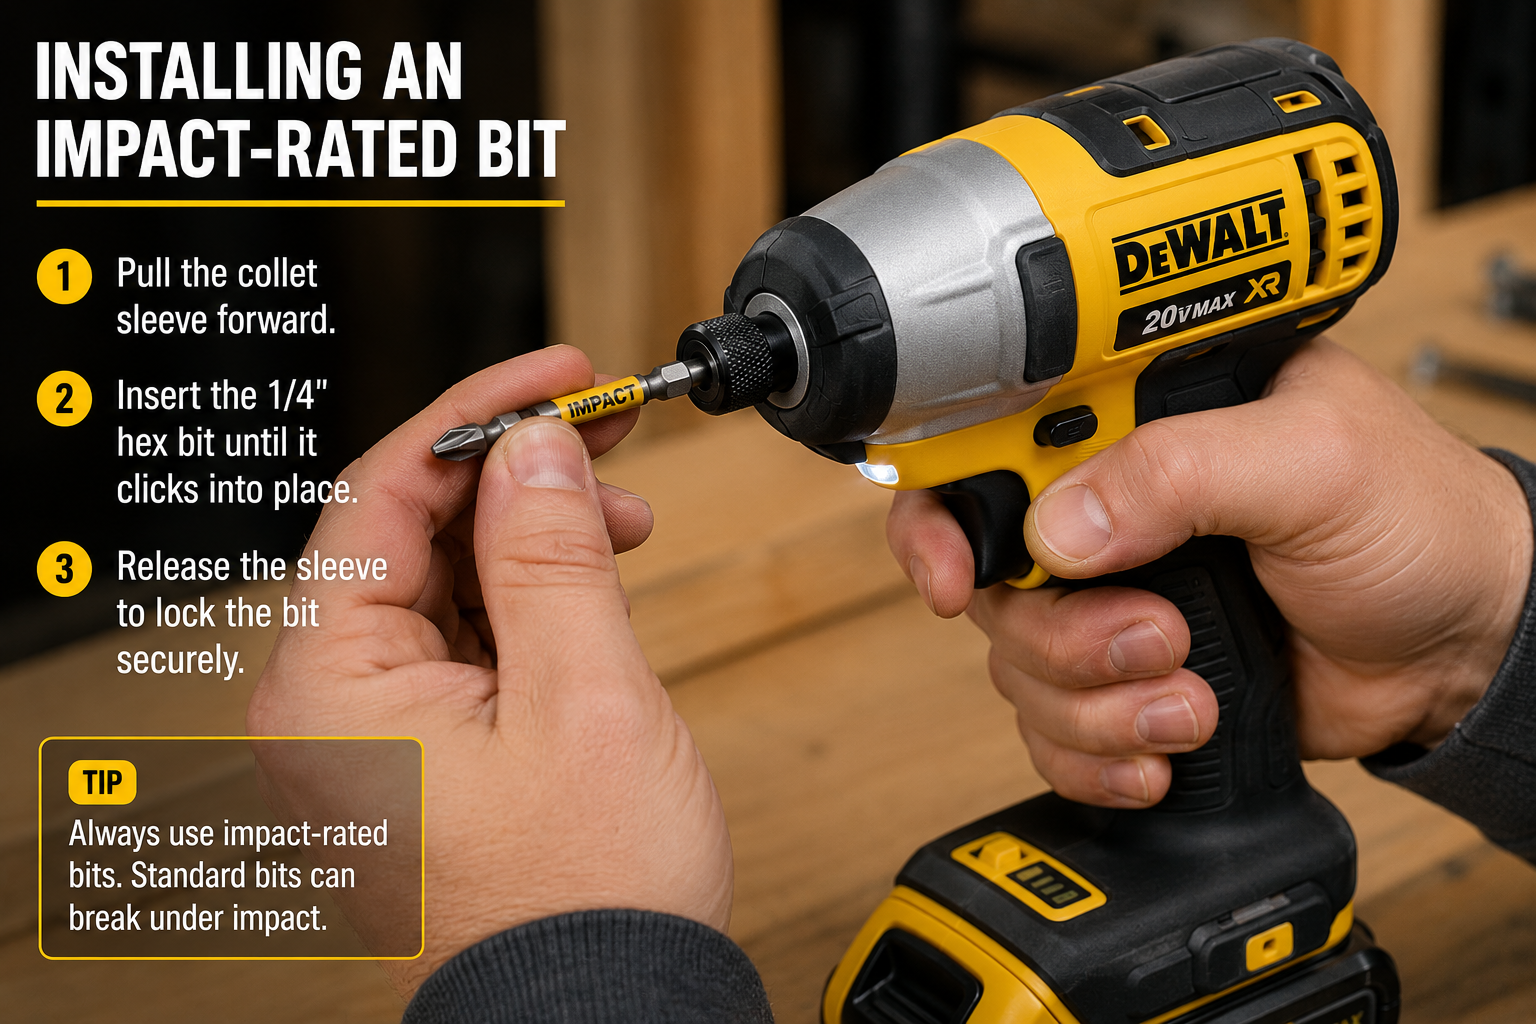
Setup only takes a minute, but choosing the correct accessory matters. Impact drivers repeatedly load the bit with sharp rotational impacts, so use accessories rated for impact use.
Step 1: Choose the Correct Bit
Match the driver bit to the fastener head exactly. Phillips, Torx, square, and other heads require the correct type and size. A loose fit makes cam-out and stripped screw heads much more likely.
Step 2: Install the Bit
Remove the battery if your manufacturer’s instructions recommend doing so for accessory changes. Operate the collet, insert the 1/4-inch hex-shank bit fully, and confirm that it is locked in place before reinstalling the battery.
Step 3: Select Forward
Move the direction selector fully into the forward position for driving. Do not leave it halfway between positions.
Step 4: Choose a Low Mode to Start
If your driver has adjustable modes, start low when working with smaller screws or unfamiliar material. You can increase the setting if the fastener needs more power. For a real example of how multi-speed control works on a compact driver, see our DeWalt DCF850 review.
Step 5: Test the Trigger
Briefly squeeze the trigger away from the workpiece so you can feel how gradually the speed increases. You should be able to start the tool slowly rather than jumping immediately to full speed.
How to Drive Screws With an Impact Driver
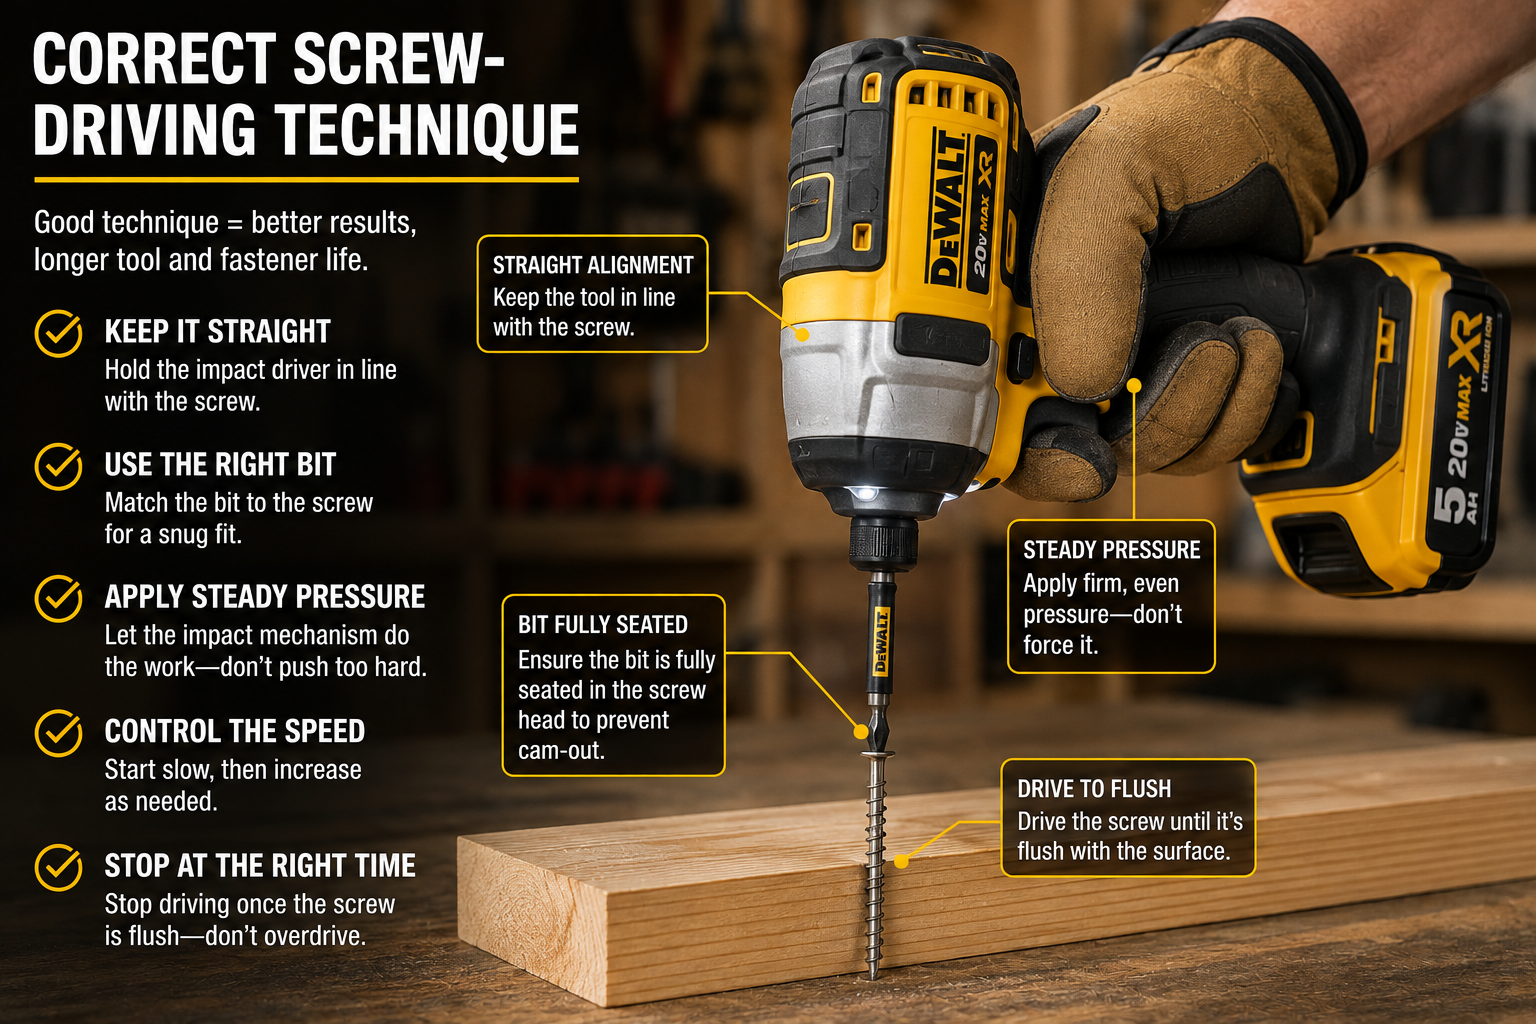
This is where the tool shines. The goal is not maximum speed; it is keeping the bit engaged and using only as much power as the fastener needs.
Step 1: Seat the Bit Fully
Place the driver bit completely into the screw head. Keep the tool in a straight line with the screw rather than approaching it at an angle.
Step 2: Apply Steady Forward Pressure
Use enough forward pressure to keep the bit seated. You should not need to lean your entire body into the tool.
Step 3: Start Slowly
Gently squeeze the trigger until the screw begins entering the material. A controlled start helps prevent the bit from jumping out of the fastener head.
Step 4: Increase Speed as Needed
Once the screw is established, increase trigger pressure. As resistance rises, you will hear the impact mechanism begin its characteristic rapid knocking sound. That is normal operation.
Step 5: Stay Aligned
Keep the tool, bit, and screw on the same axis throughout the drive. Tilting the driver increases the chance of cam-out, bit wear, and a damaged fastener head.
Step 6: Ease Off Near Final Depth
Reduce trigger pressure as the screw approaches the surface. An impact driver can bury a screw surprisingly quickly, especially in soft wood.
Step 7: Stop When the Fastener Is Seated
Release the trigger as soon as the screw reaches the required depth. Continuing to hammer after it is seated adds no benefit and can damage the fastener, material, or bit.
How to Remove Screws With an Impact Driver
An impact driver is also useful for removing fasteners, particularly when a normal screwdriver or drill struggles.
Step 1: Switch to Reverse
Wait until the tool has completely stopped, then move the direction selector to reverse.
Step 2: Use a Fresh, Correct-Fitting Bit
A worn bit can round an already-tight screw head. Use the exact bit type and size and seat it as deeply as possible.
Step 3: Start With Controlled Pressure
Hold the driver straight, apply firm forward pressure, and squeeze the trigger gradually. Let the impact mechanism work rather than repeatedly slipping out of the head.
Step 4: Stop if the Fastener Is Being Damaged
If the bit repeatedly cams out or the screw head starts rounding, stop. Continuing at full power can turn a difficult removal into a damaged fastener that requires extraction.
Impact Driver vs Drill: Which Should You Use?
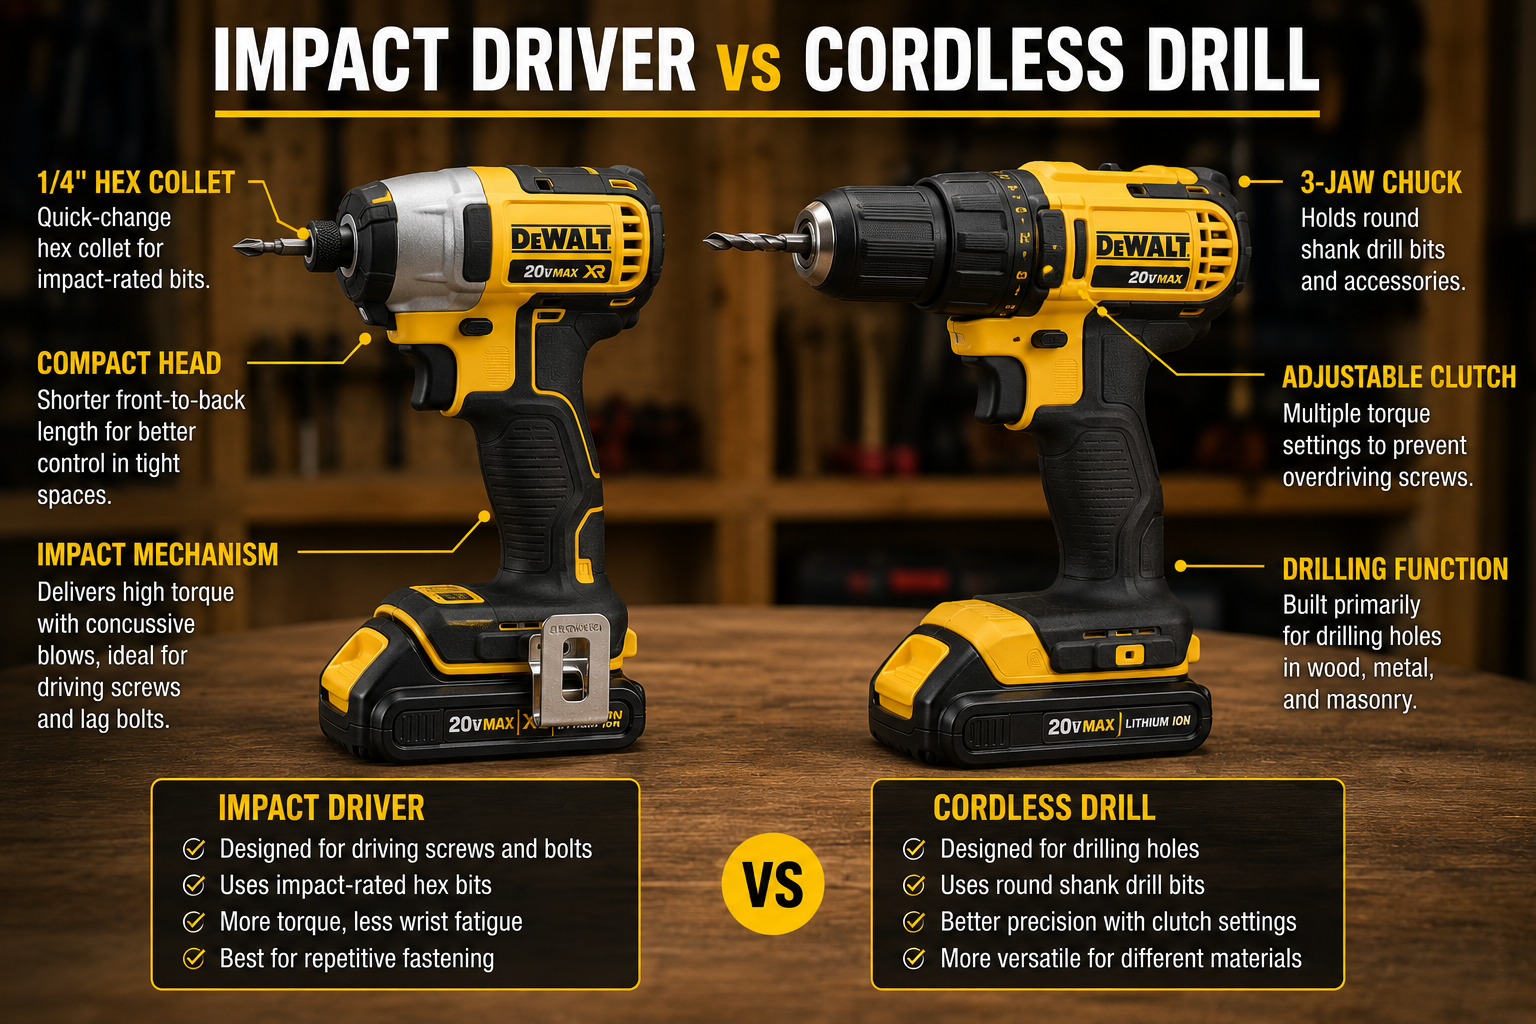
A cordless drill remains the more versatile choice for drilling holes and controlled light-duty screwdriving. Its adjustable chuck accepts a wider range of drill bits, and its clutch can limit torque when you want precise screw depth.
An impact driver is better suited to repetitive fastening, long screws, and jobs where extra rotational force is useful. Many DIYers eventually keep both because they complement each other: drill the pilot hole with the drill, then drive the fastener with the impact driver.
If you need help with the other tool, read our guide to using a cordless drill.
Can You Drill Holes With an Impact Driver?
Yes, for some jobs. An impact driver can use drill bits specifically designed with a 1/4-inch hex shank. That can be convenient for small holes in wood and certain general-purpose tasks. If drilling is the main job, our best cordless drills guide covers better all-purpose options.
However, an impact driver is not a full replacement for a drill. Its collet limits accessory compatibility, and its impact action is not ideal for every material or precision drilling job. For routine hole-making, a cordless drill is usually the better choice.
Common Impact Driver Mistakes to Avoid
Using Standard Bits Instead of Impact-Rated Bits
Ordinary driver bits may wear or fail faster under repeated impacts. Use impact-rated bits and accessories intended for this type of tool.
Starting at Full Trigger
Maximum speed immediately can make the bit slip and makes depth harder to control. Start slowly and increase speed only after the screw is established.
Using the Wrong Bit Size
A bit that almost fits is not good enough. Poor engagement is one of the easiest ways to strip a screw head.
Holding the Driver at an Angle
Keep the driver aligned with the fastener. Angled driving encourages cam-out and uneven fastener seating.
Overdriving Screws
Unlike a drill with a clutch, many impact drivers will keep applying impacts until you release the trigger. Slow down before the screw reaches final depth.
Using Too Much Tool for Delicate Work
Small hardware, soft materials, and finish work may be easier with a drill, screwdriver, or a low assist mode. More power is not automatically better. For heavier masonry work, an impact driver is also the wrong substitute; see our best hammer drills guide if concrete or brick is your main task.
Impact Driver Safety Tips
Impact drivers are compact, but they can deliver substantial force. Treat them like any other power tool.
- Wear eye protection. Fasteners, bits, and material can produce chips or fragments.
- Use hearing protection when appropriate. Impact drivers can be noticeably louder than drills, especially during extended fastening.
- Secure loose workpieces. Clamp material when practical instead of trying to control both the workpiece and tool.
- Keep hands clear. Do not place fingers near the rotating bit, socket, or fastener.
- Use the correct accessories. Bits, sockets, adapters, and extensions should be suitable for impact use and the specific job.
- Check for hidden services. Before driving long fasteners into walls or concealed areas, consider electrical wiring, plumbing, and other hidden hazards.
- Follow the manufacturer’s manual. Modes, accessory-change procedures, operating limits, and safety instructions vary by model.
If access is the problem, compare compact impact drivers and measure the complete setup before replacing your tool. For Milwaukee owners, our 3453 vs 2953 comparison explains the battery-platform and clearance tradeoffs.
Frequently Asked Questions
Is an impact driver good for beginners?
Yes. The controls are simple, but beginners should practice trigger control on scrap material first. Start slowly, keep the tool straight, and learn how quickly your driver seats a screw before using maximum power.
Why does an impact driver make a hammering noise?
The noise comes from the internal impact mechanism engaging as resistance increases. It delivers rapid rotational impacts to help turn demanding fasteners.
Do impact drivers have a clutch?
Most traditional impact drivers do not have the adjustable numbered clutch found on many cordless drills. Some newer models provide electronic speed or assist modes, but you still need to control final depth with the trigger.
Can I use normal drill bits in an impact driver?
Not directly in the standard 1/4-inch hex collet. You need compatible hex-shank drill bits or a suitable adapter. For regular drilling and broad bit compatibility, use a drill.
Why does my impact driver keep stripping screws?
The usual causes are the wrong bit size, a worn bit, poor alignment, insufficient forward pressure, or too much speed. Check the bit fit first, then start more slowly.
Can an impact driver remove stuck screws?
It can help because the rotational impacts can break some fasteners loose. However, stop if the screw head begins to strip. A damaged or corroded fastener may require a different removal method.
The Pelstro Bottom Line
Learning how to use an impact driver comes down to three habits: use the correct impact-rated bit, stay aligned with the fastener, and control the trigger. Start slowly, let the impact mechanism add force when resistance increases, and ease off before the screw reaches its final depth. Once those habits become automatic, an impact driver is one of the fastest and most useful fastening tools for DIY projects, repairs, framing, decking, and general workshop work.
Choosing an impact driver? See our Best Impact Drivers guide. You can also continue with our How to Use a Cordless Drill guide.
Pingback: How to Use a Cordless Drill: A Beginner’s Guide - Pelstro
Pingback: How to Maintain Your Power Tools: A Complete Beginner’s Guide - Pelstro
Pingback: DeWalt DCF845 Review (2026): Is It Worth It?
Pingback: Milwaukee 2953-20 M18 FUEL Impact Driver Review: Is It Worth It in 2026? - Pelstro
Pingback: Makita XDT19Z Review: Is It Worth It in 2026? - Pelstro
Pingback: DeWalt DCF850 Review (2026): Is It Worth It?
Pingback: DeWalt DCF860 Review (2026): Is It Worth It?
Pingback: How to Store Power Tools Properly: A Complete Guide - Pelstro
Pingback: Bosch GDR18V-1950CN Review: Is It Worth It in 2026? - Pelstro
Pingback: Bosch GDR18V-215 Review: Is It Worth It in 2026? - Pelstro